
Expert Consulted: Adrian Gardiner. I’m drawing on my own 30 years of experience in the IT industry to write this article, having built, maintained, and repaired many computers, including Gaming PCs, for my customers. Using this experience, I can answer the question: ‘How long does a Gaming PC last?’
So, exactly how long does a gaming PC last? This is a common concern for buyers about to make a big investment who want to ensure they made the right decision.
So, exactly how long does a gaming PC last?
A Gaming PC lasts about 10 years and depends on good quality parts (i.e., PSU), great maintenance (i.e., preventing dust build-up), minimal overclocking, great cooling and ventilation both inside the case and all around it, plus upgrading when necessary to keep up with new resource hungry games.
In the rest of this article, I’ve explained in more detail how you can get the best life out of your Gaming PC and what to look out for.
Related Article: check out 5 easy steps on how to afford a Gaming PC
How Long Does a Gaming PC Last? 5 Key Issues Covered
The issues outlined in the next sections cover the main areas affecting the life of a Gaming PC.
Issue 1: Quality of Parts
Choosing high-quality parts from respected, well-known brands can make a big difference to the life of a Gaming PC.
Power Supply Unit (PSU)
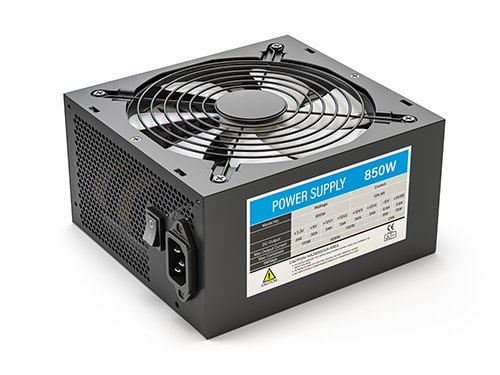
From my experience, this is probably the most important component to get right. Go for a well-known branded PSU, e.g., Corsair, EVGA) with good online reviews and from a manufacturer with a good reputation for quality.
A poor quality PSU can fail gradually over time, causing a wide range of issues, and it can also go quickly, sending a surge through the motherboard, causing all sorts of damage and potentially taking other components with it like your hard drive, RAM, and even the Graphics Card. It can be expensive!
Tip: Consider purchasing a good quality Surge Protector or UPS (uninterruptible power supply).
RAM (Random Access Memory)
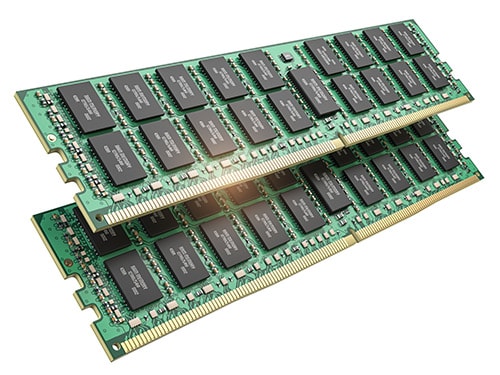
Choosing good quality RAM from a reputable manufacturer (e.g., Crucial, Corsair, and Kingston) is a must.
Over the years, I’ve dealt with a number of RAM failures, often within the first year, so under warranty but still annoying and time-consuming to diagnose and fix. RAM can also fail at any point in the life of the PC.
Storage
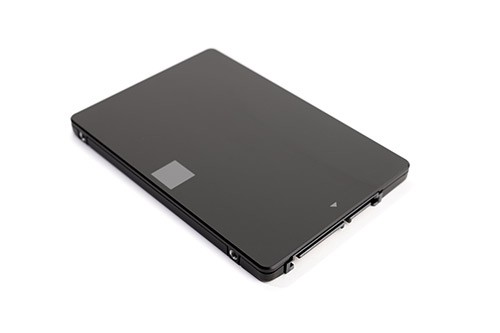
There are two main types of storage drives available today: older-style hard disk drives with a spinning disk (HDD) and solid-state drives (SSD). SSDs are absolutely the way to go, as they are both considerably faster, more resilient, and reliable.
Although SSD drives are more reliable, I have seen client computers fitted with less well-known SSD brands fail, so again, a good quality SSD from a reputable and well-known brand is a must (e.g., Samsung, Crucial, Kingston).
Motherboard

A good quality, well-specified motherboard would make a great choice for your gaming PC, and again, choosing a well-known, reputable brand (e.g., ASRock, Gigabyte, and MSI) will serve you well in the long run.
Cheap motherboards are prone to earlier failure due to poor quality soldering or faulty capacitors and other sub standard motherboard components.
Issue 2: Location and Environment
Where you locate your computer can have a huge impact on its longevity. Try to follow these recommendations where possible:
- Surface and Environment: Place your gaming PC on a level and stable surface in a dry, clean environment with good ventilation, ensuring good airflow all around the computer.
- Locate off the Floor: Ideally, placing your PC off the floor (e.g., on a desk) is best (especially if you have a dog or cat – pet fur is a nightmare for computers) to minimize dust and avoid it being kicked by your feet!
- Avoid Heat Sources: Avoid placing the computer near a source of heat, like radiators or panel heaters.
- Smoking: If you smoke, try to avoid smoking near your PC or in the same room. The tar from cigarette smoke is horrible for computers and coats the inside of the PC, allowing dust to stick, making it very difficult to clean.
- Keep Ventilation Clear: Another common mistake people make is to place the PC up against a wall or the side of a cupboard that completely blocks the side or rear panel vent – a quick way to overheat your PC.
Real World Example of Poor PC Location
I once visited a customer whose PC would not start after having just moved it to a new location.
On arrival, I found the computer had been placed on a floor made up of uneven and rough brick tiles, which left red dust on anything that touched them. As a result, the computer was vibrating (preventing it from starting!) and also likely to become full of dust over time.
Moving the PC back to a clean and level surface fixed it, and all was well!
Issue 3: Regular Maintenance
Looking after your PC requires keeping it clean, keeping a watchful eye on temperatures and any strange noises that develop (i.e., like a faulty cooling fan), and also keeping the operating system, security, and programs up to date.
DISCLAIMER

The computer cleaning information provided is for information purposes only and assumes the reader will take all necessary safely precautions prior to and during the cleaning process.

The Voice of Tech cannot be held liable for any damages or losses that may occur as a result of cleaning.

The reader is responsible for ensuring a backup is made of any important data prior to starting the cleaning process.
Hardware
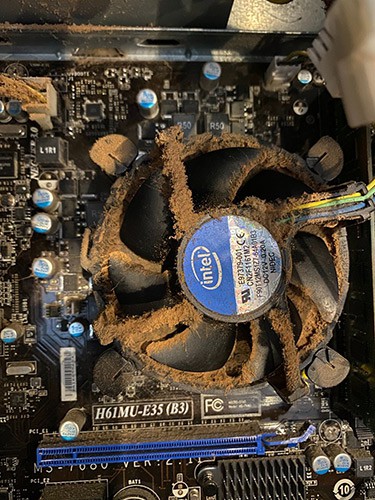
Maintaining your PC hardware regularly is extremely important. The biggest PC killer is dust! Allow it to build up inside the case, and various components will, in time, be at risk of failure.
IMPORTANT: Minimise the risk (low) of electrostatic shock (it can damage PC components) by grounding yourself before touching the inside of your PC case. Place the PC on a rubber anti-static mat on a hard surface.
Avoid standing on the carpet in socks (go barefoot on a hard floor), which will generate static if you move your feet a lot. Touch grounded metal objects (e.g., a water pipe) every few minutes.
Maintenance Schedule Recommendations
Item 1: Keep a watchful eye to ensure temperatures stay constant.
Item 2: If CPU temperatures are too high, check the CPU cooler and thermal paste
Items 3 – 5: At least every 3 months or earlier if the case starts to look dusty
- Monitor temperatures of the CPU and Graphics card. Some motherboards come with temperature monitoring, so keep an eye out for that, too, if available.
- Thermal Paste: High CPU temperatures (in addition to excessive overclocking and cooler failure) can, over time (5+ years for a good quality paste, depending on the intensity of computer use), be the result of the thermal paste between the CPU and its heatsink drying out. Removing the heatsink and fan would identify if this is the case. A fresh application of thermal paste would be the solution (e.g., Noctua NT-H2 or Arctic MX-6)
- Dust: Check the exterior and interior of the case for dust build-up
- Fans: Check that all the internal fans are working ok and are clean
- Filters: Regularly check filters (if fitted) at the front and underside (near PSU) of the PC for dust build-up and clean as necessary to ensure good airflow
- Keyboard: If you enjoy eating near your PC, try not to eat over the keyboard! Over time, your keyboard will not only look awful, but it will likely not perform as well with food stuck under the keys. Also, keep drinks well away from your PC!!!
How to Clean your PC
OK, so you’ve had your nice Gaming PC for some time now, and it needs a clean. If this is something that you think you can handle, here are a few recommendations on how you can keep it clean and in tip-top condition.
If this process fills you with dread, give your local IT support company a call, and they’ll be happy to do it for you.
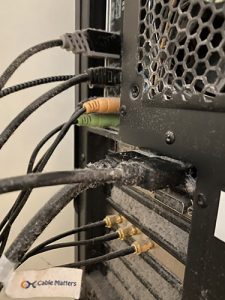
Take care when poking around inside your computer case. If you’ve never done this before, you might want to invite a friend with some experience to help.
Go slow, and never force anything when trying to undo or remove something from the case.
Make sure you’re not invalidating your warranty by opening the case and removing parts.
Computer Tower / Case
Note: If there is dust on the outside, there is a good chance there will be more dust on the inside.
Tools / Equipment Required
- Phillips Screwdriver.
- Hoover with a hose attachment and a soft brush.
- Air Canister(s) – you can buy these quite cheaply on Amazon.
- Isopropyl Alcohol (90%).
- Cotton swabs.
- Kitchen roll paper (for drying).
- Toothpicks.
- Thermal Paste (if required).
Cleaning Instructions
- Turn off your PC and carefully disconnect all cables from the tower. (most cables can simply be pulled out, but the ethernet/network cable (if used) will have a clip on the connector that needs squeezing before the cable will come out – be gentle! Some DisplayPort cables come with a lock button that needs to be depressed to be able to remove the cable.
- Move the PC to somewhere with a bit of clear space.
- Remove the side panel that gives you access inside the case (usually the panel on the left when looking at the front of the tower).
- From the inside of the case, gently hold the rear case fan to stop it moving, and at the same time, use a hoover with a suitable hose attachment and soft brush on the end to carefully clean the rear panel of the tower.
- Remove any filters: there is often a slide-out filter beneath the PSU if it is bottom-mounted. There is also often a filter behind the front panel of the tower. Refer to your case instructions to remove this filter.
- Lay filters down on a worktop and gently clean both sides of each filter with a soft brush and a cloth soaked with some warm water if needed. Dry as required and put aside for later re-installation
- Move the PC to a safe location, ideally outside (so you can blow dust everywhere) if it’s dry with no chance of rain.
- Use the Air Canister to blow air inside the case wherever there is dust – watch out! Dust will go everywhere!
- Step 8 above is usually enough to remove most of the dust; however, if, for example, the CPU has dust embedded in the cooling fan, it may need to be removed.
Usually, it is possible to remove the fan without disturbing the heatsink by undoing a few screws although you will need to remove the power cable from the fan to the CPU pin connection on the motherboard. To remove, grasp the white connector on the end of the fan cable and carefully pull upwards to release - Once the fan is removed, clean the heatsink (if required) with a toothpick/cotton swab soaked with isopropyl alcohol and then hoover ‘gently’ to get rid of the loosened dust.
- Wipe over the fan blades with a slightly damp, lint-free cloth to clean off as much dust/dirt as possible. Once clean, check to make sure the fan still freely rotates.
Refit the cooling fan by attaching it back to the heatsink using the removed screws. Finally, re-attach the fan cable connector to the CPU pin block on the motherboard.
Keyboard
First, choose where you are going to clean your keyboard (outdoors or maybe over a bathtub), as dust and debris will go everywhere!
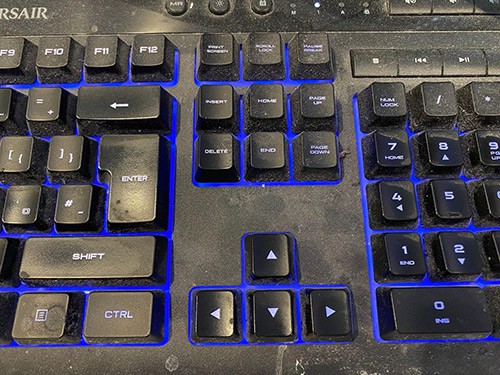
Disconnect your keyboard (if it’s a wired one), lift it upside down, and give it a good shake to remove some of the loose debris
Mechanical Keyboards
- If you have a mechanical keyboard, these usually have removable keys, making it much easier to clean.
- Use the provided key removal tool to take the keys off, allowing you to wipe the keyboard easily.
- Gently wash the individual keys with a cloth soaked in warm, soapy water, dry them off, and refit.
Non-Mechanical Keyboards
- Use an air canister to blow compressed air between the keys to clear debris.
- You can also use a toothbrush to clean between the keys or a brush made just for cleaning keyboards.
- Use a slightly damp, lint-free cloth to clean gently between the keys and the surface of the keys themselves.
Mouse
Wipe the underside of your computer mouse with a slightly damp, lint-free cloth and gently remove any build-up of grime.
The top of the mouse and the keys can also be cleaned with the same cloth. Be careful not to allow any water to get into the gaps.
Software
Whilst maybe not quite as important as maintaining the hardware, if you want your computer to perform at its best, you need to keep it updated with regular:
- Windows security updates and patches.
- Driver updates (usually included with the Windows updates).
- Graphics driver updates (I would usually update these myself rather than let Windows do it).
- Game updates (patches and bug fixes).
- Security updates – use good quality security software and keep it regularly updated.
Issue 4: Cooling
Proper cooling of your gaming PC is critical to it lasting a long time. Try to watch out for the following:
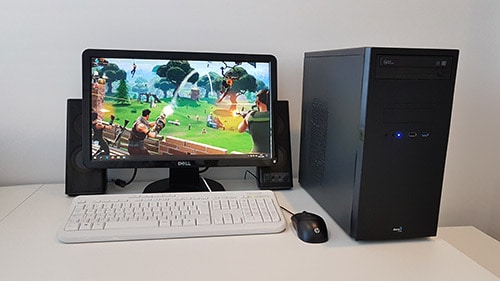
- Dust: Regularly maintain your PC and remove dust before it builds up so much that it blocks your ventilation.
- Temperatures: Keep a close eye on CPU, Graphics Card, and, if possible, Motherboard temperatures, especially during extended gaming sessions.
- Overclocking: Set this up with care, following manufacturer recommendations for each component, as this will only add to the strain on your system.
- Location: Carefully locate your computer so that it gets good airflow all around it with no vents blocked.
- Raised Mounting: Consider putting your computer off the floor on a desk to help improve airflow and minimize dust and accidental damage from feet and hoovering!
Issue 5: Hardware Updates
Over time, software updates to both Windows and to your games will mean your current computer hardware no longer gives you the performance you once had, and so updates may be required, like more RAM, an improved graphics card, or a faster storage drive.
These are great and simple ways to extend the life of your Gaming PC.
Conclusion
Choose your components carefully, locate the PC in a clean, dry environment with good ventilation all around, maintain it regularly, update the hardware as required, and your Gaming PC will give you many years of reliable service.
Image Attribution and Licencing
2021-09-02-14-57-01-utc, Computer AC Power Supply Unit by maxxyustas, Envato
2021-09-02-14-57-01-utc, DDR RAM Modules by indigolotos, Envato
022-12-16-11-17-16-utc, Solid State Drive by formatoriginal, Envato
2021-08-26-15-35-59-utc, Motherboard by indigolotos, Envato

