Expert Consulted: Adrian Gardiner. Years of experience buying both computers and computer parts for my own new customer builds has given me a good insight into the PC build process. In this article, I’ll be sharing my knowledge with you on the time it takes to build your own PC.
So you’ve decided to build your own PC and are concerned about how long it may take. This question depends on a number of factors that will greatly influence the time it takes to complete your PC build.
So, the short answer is, how long does it take to build a PC?
The time it takes to build your own PC depends on your experience and the complexity of the build. For beginners, a basic PC build can take about 2 hours, and a complicated gaming PC build can take over 4 hours. With prior experience, a basic PC can take around 1 hour or less, while a complicated gaming build may require up to 3 hours or more.
The rest of my article goes into detail on the time it takes to build a PC and how you can build your own in a reasonable time frame.
How Long Does it Take to Build a PC – Explained
To help understand the process of building a PC and the factors that can influence how long it takes, I’ve outlined the key areas below.
I’ve also put together a section with my own tips and tricks that I’ve learned over the years that can help you speed up your own build, saving you both time and frustration.
Can Anyone Build a PC?
Literally, anyone can build a PC. The process these days is considerably easier than it used to be, and so long as you have steady hands and can wield a screwdriver, then you can do it.
Now that we no longer fit DVD-RW drives and, most often these days, no HDDs, there is a lot less cabling to do inside the case, which makes things much easier.
The parts used to build a computer are very modular and, for the most part, designed to slot together fairly easily. All the most important components, like processors, motherboards, RAM, etc., are manufactured to recognized standards so that you can easily work out which part will fit to another.
Preparing for Your PC Build
The most important step in saving yourself time during the actual build is preparation. Get this bit right, and you’re well on the way to achieving a smooth and timely build.
Component Selection
First, you’ll need to choose the parts for your build. Choosing your parts will take time if you’ve never done this before, as you’ll need to familiarise yourself with the terms.
I can recommend visiting the PC Partpicker website, which will help you greatly in both choosing parts and making sure that what you choose will all fit together.
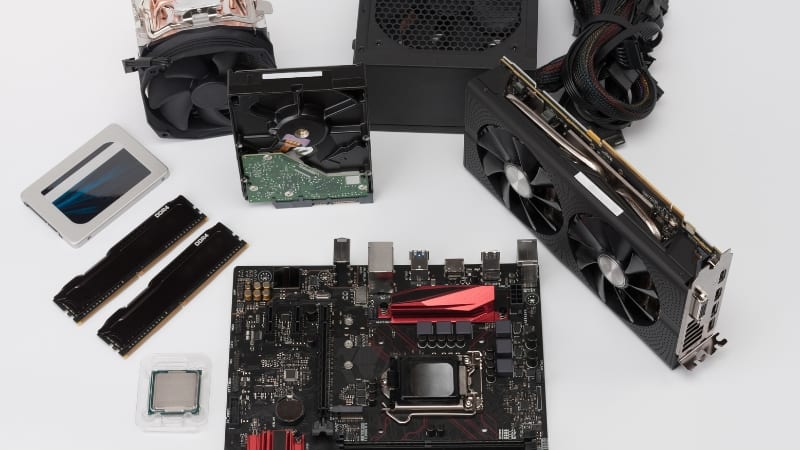
You’ll need the following components for your new PC:
Main Components:
- Computer case/chassis
- Processor (CPU)
- CPU Cooler (these are often bundled with the processor)
- Motherboard
- Random Access Memory (RAM)
- Storage (either an HDD or SSD). I recommend you go for an SSD – much faster.
- Graphics Card (GPU)
- Power Supply Unit (PSU)
- Computer Monitor
- Mouse / Keyboard
- Windows 11 Licence.
Additional Components you may need:
- Wi-Fi Adapter (either PCIe or USB format). Some motherboards have this built in.
- Additional case fans for extra cooling
- An All in One Cooler (AIO) if you choose to go liquid-cooled instead of air-cooled CPU.
NOTES:
- Before buying your parts, check out my section below, ‘Tips for Saving Time on Your PC Build,’ as I mention some tips on buying parts that will save you time.
- If you can, try to get a CPU with integrated graphics. If you ever have a problem with your dedicated graphics card or display issues in general, it can be really helpful to have an alternative way of connecting your monitor to the PC.
- When buying your computer case, check as many customer reviews as possible to make sure there are no issues that might hold you up during the build process.
The PC Build Process – Steps Involved

Here are the key build process steps.
Getting Your Parts Ready
If you’re new to building a PC, I would first find an area of clear space to carry out your build, like a dining room table, for example, or a large desk (with suitable protection against scratches, etc.).
Then, check that you have every component that you need, lay them all out, and make sure you understand what goes where. The manual included with the motherboard will have instructions on fitting both the CPU and RAM.
Static
We all know that annoying static electricity zap that we get sometimes when getting in to or out of a car, for example. We can build this charge up in our bodies in certain circumstances, and this static is not good for electrical components, particularly computers and their sensitive parts.
To protect against static, try to take precautions as follows:
- Ground yourself with an anti-static wristband
- Touch a grounded metal object every few minutes when working on your PC
- Avoid standing on the carpet when wearing socks.
Assembly
Now you have all your parts, and you’re ready to get started putting it all together. Allow yourself at least a couple of hours to do this, depending on the parts that you’ve chosen. This process does get much faster as you become more familiar with the steps involved. Whatever you do, take your time and try not to rush.
Unpack all parts and lay them out on top of their boxes, ready for assembly.
The following steps provide a general guide to putting your PC together. For a more detailed guide, please check out my article Building a Gaming PC for Under $1000.
- Unpack the computer case, and remove both side panels, and put them somewhere safe where they won’t get knocked or damaged.
- Fit the I/O Shield to the computer case.
- Fit any missing motherboard stand-off posts to the computer case as required. These are what you will be screwing the motherboard to when adding it to the case.
- Fit the CPU, RAM, CPU Cooler, and M.2 SSD storage (if purchased) onto the motherboard.
- Fit any other storage drives to the case.
- Fit the computer case cables to the motherboard (much easier to do these before placing the motherboard into the case). These cables cover the case USB ports, power button, and headphone/speaker jacks, for example.
- Fit the motherboard carefully into the case and secure it with provided screws.
- Connect the CPU cooler fan cable to the header on the motherboard.
- Install the PSU and connect to the motherboard.
- Install the graphics card and connect the PCIe power cable.
- Before tidying up any cabling, first power up your PC and check to make sure it boots into the BIOS.
- If it boots up okay, you can now finish the build by tidying up the cabling as required with cable ties.
Installing Windows and Applications etc.

Check first to make sure that your new components all show up in the BIOS. You should usually see, at a minimum, the CPU and RAM on the front page of the BIOS, but you may have to dig a bit to find the storage drive.
Providing you have your storage media ready, installing Windows onto a new computer is very straightforward and shouldn’t take more than 30 minutes – usually much less. If you need to download Windows, depending on your connection speed, this could be about 30 minutes but could be longer if you have slow Internet access.
Installing Windows from a USB flash drive is the quickest method.
Once you’ve installed Windows, you can log in to your new build and start applying various Windows updates and any software like security, games (depending on your game choice, this can take a long time with the huge size of today’s computer games), etc.
I would recommend installing your graphics drivers directly from either AMD or NVIDIA rather than relying on Windows to do it.
Troubleshooting Your Completed Build
If you took your time and prepared well, you shouldn’t have run into any problems, but it’s not unusual to have the odd issue with a new build, and even I see problems every now and then.
If the PC doesn’t boot up, make sure all cables are securely plugged in. Also, you can try reseating the RAM modules (hopefully, you don’t have to remove the CPU cooler to do this!).
Sometimes, you’ll have issues that may need reading the relevant manual or searching the Internet for guidance. Either way, there is always a logical reason for the problem, and often, the fix is much simpler than you think.
Tips for Saving Time on Your PC Build
I’ve learned a few very useful tips over the years that can save you a lot of time when building a new computer. Hopefully, they’ll help you too.
Tools
Have the right tools to hand, and you’ll be much quicker. Magnetic-tipped screwdrivers are a lifesaver and can really speed the process up by allowing you to place a screw on the end and then line it up to be screwed in. This is also handy when placing screws into the motherboard fixing locations – it’s nigh on impossible to locate a screw into the right position by hand.
RAM – Install RAM before you fit the CPU cooler
Fit the RAM before you fit the CPU Cooler if you’re using air cooling, as the cooler may be so large that it partially covers the RAM memory modules, making it impossible to install at least one or possibly more modules without taking the cooler off again – it’s happened to me during a build.
Cabling – Plan your cabling
Plan your cabling route through the case before you start so that you can achieve the best layout for a neater, cleaner look inside your case.
Also, always make sure everything is working perfectly before tidying up all your cabling with cable ties, etc. – it would be a real pain to have to remove it all if, say, the PSU was faulty.
Power Supply Unit (PSU) – Go Fully or at least Semi-Modular

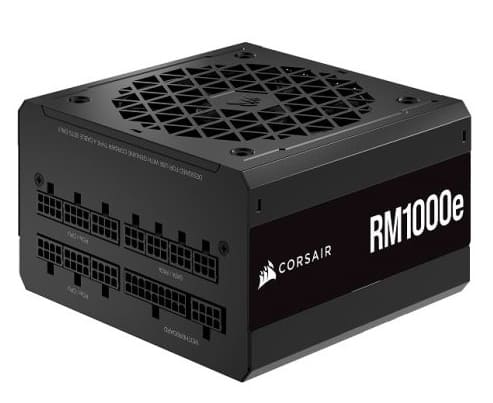
This will cost you a bit more but save you loads of time and frustration during assembly. With a fully or semi-modular PSU, you can dump the many cables you don’t need, making it much easier to cable everything up without masses of redundant cabling getting in the way of everything.
Motherboard – Attach case cables before fitting
It’s much easier to fit the case cables to the motherboard before fitting into the case. What I do is carefully balance the motherboard (with a bit of foam or bubble wrap underneath to avoid scratches) on the edge of the case so the cables will just reach, attach, and then fit the board into the case.
Doing it this way makes it considerably easier to connect the cables than when the board is in the case where it’s likely very dark and often hard to see what you’re supposed to plug your cable into. The pins on a lot of the motherboard headers are very delicate and easy to bend if you’re not careful when connecting up.
Also, when placing the motherboard into the case and lining up the rear ports with the openings in the I/O shield whilst holding the motherboard in position, have a quick look at the back to make sure none of the ports are obstructed and that everything lines up.
I’ve had so many motherboards supplied with an HDMI slot on the I/O shield, requiring gentle modification to make it fit properly.
Conclusion
Building a PC isn’t really that hard, and with the right preparation and planning should go pretty smoothly and may not take as long as you think. If you’re new to building a computer, try not to get too complicated at first – you can always upgrade your system at a later date to something a bit more fancy.
So, building a basic computer for someone new would take roughly a couple of hours, and for someone with experience, an hour or less. For a more complex build, allow about 4 hours or more for a newbie and up to 3 hours for an experienced PC builder.
If you’re building a PC for the first time, you can speed up the process by doing it together with a knowledgeable friend and avoid any first-time mistakes, too.

