

Expert Consulted: Adrian Gardiner. After years of experience building and maintaining my customers’ computers and keeping them running nicely, I’ve got a lot of experience to share with you. In this article, I’ll be sharing my knowledge and tips to help you keep your computer CPU nice and cool.
Keeping your CPU and, indeed, all of your computer components as cool as possible is essential to them having a good, long working life.
As the heart of your computer, the CPU generates a lot of heat, so effectively getting rid of that heat as quickly as possible will make all the difference to the overall performance of your PC.
In this article, I’ll be showing you 23 effective methods on how to lower the CPU temp in your PC.
How to Lower CPU Temp – 23 Effective Methods
Below, I’ve listed 23 great approaches to keeping your CPU temperature as low as possible. Some can be applied by just checking your Windows software, whilst with others, you may need to clean your PC, and there will be upgrade possibilities, too.
If your CPU temperatures are currently too high or you just want to know how to avoid excessively high temperatures in the future, my comprehensive list of tips should help you out.
If I can think of any more, I’ll add them as and when.
1. Remove Unnecessary Programs at Startup
It’s not unusual to find various programs starting with Windows when you first turn your computer on. This usually happens when you install a new program, and it inserts itself automatically into the start-up programs.
Over time, this list of programs can get quite large, and each one will be taking up resources both in terms of memory and CPU usage.
For example, anti-virus programs are a common culprit here, with some being better than others at managing how much resource they take from a system.
If you have plenty of installed memory, i.e., 16 GB or more, and a decent CPU (higher than an Intel Core i5 or Ryzen 5), this will be less of a problem, but it can still happen to some computers.
Related Article: Is 8 GB of RAM Enough for Gaming?
Which Start-up Programs Should I Keep / Remove?
Rather than attempt to list all the possible unwanted start-up programs (there would be way too many!), I’ve listed below those programs that I would expect to be starting with Windows and, therefore, would not ‘usually’ need to be disabled.
Anything else needs to be considered as something that could be disabled.
Please note that this list is just a general guide, as everyone’s computer is going to be different. From customers that I come in contact with, I usually leave the following programs alone unless they came as bloatware with the computer when new and were not wanted by the client.
- Security software like Norton, McAfee, Kaspersky, Sophos, etc.
- VPN (Virtual Private Network) Software
- Password Manager programs like NordPass, Dashlane, Kaspersky, Norton, 1Password, etc.
- Backup programs like Acronis, CrashPlan, Paragon, Veritas, etc.
- Printer status monitors are added when printers are installed – handy to have running
- Computer RGB lighting applications for PC, Mouse, and Keyboard lighting
- Video Chat / Messaging Apps like Zoom, Skype, etc., are good to have already up and running when you are called
- Steam – if you’re heavily into gaming, you’ll probably want this running at start-up.
NOTE:
- *Norton and McAfee are often installed with a new PC as a trial, usually for 30 days, although this is not always clear to the end user who may end up subscribing at full (very high) price when they could have purchased the same software much cheaper elsewhere including on the security software suppliers own website!
- Disabling a security software start-up won’t have much effect, and if you really didn’t want or need it, I would recommend you just uninstall it instead. You can install your own preferred program or use the Security that comes with Windows.
*I would remove such trials and go directly to the supplier’s own website and take advantage of special offers that they seem to run all the time these days.
How to Stop Unwanted Programs Starting with Windows
When you first get your new shiny Windows computer, there will be hardly any programs starting automatically with Windows unless your PC came pre-loaded with bloatware (unwanted software) so loading times would be pretty good.
Over time, as you install programs, more and more end up starting with your computer, consuming resources, working your CPU harder, and slowing the computer down.
Here’s how you can easily stop unwanted programs from starting with Windows, freeing up system resources to help your CPU avoid having to work too hard.
Most programs don’t need to be running at all times, so can safely be stopped (and easily re-enabled if required).
You can then just fire up your programs as and when you need them.
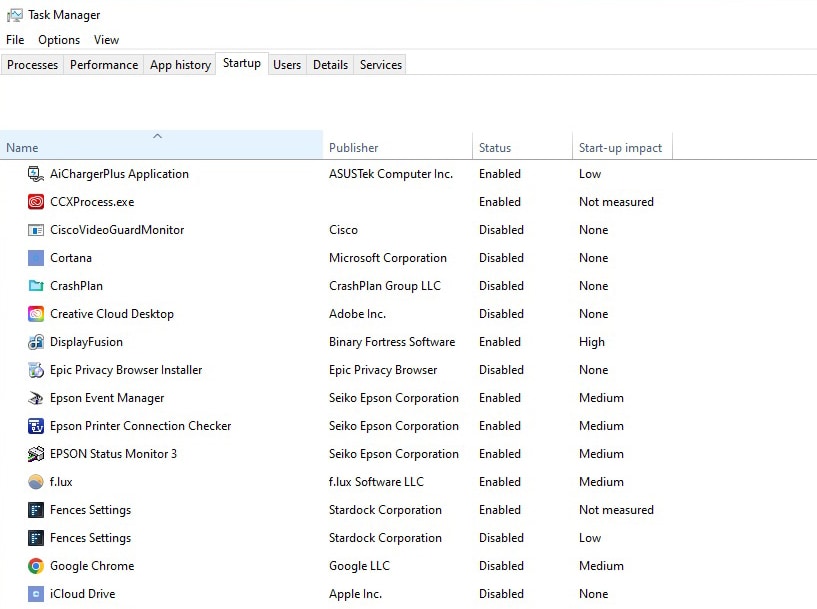
For Windows 10 and 11:
- Right-click the Windows Taskbar and click on ‘Task Manager’
- Click on the ‘Startup’ tab
- Select a program that you don’t want to start and click ‘Disable’
- Repeat Step 3 of each program that you won’t want to start
- Close ‘Task Manager’, and the next time Windows starts, you’ll have fewer programs running
NOTES:
- For both Windows 10 and 11, you can also go to Windows Settings – Apps – Startup, although I find Task Manager to be much more useful.
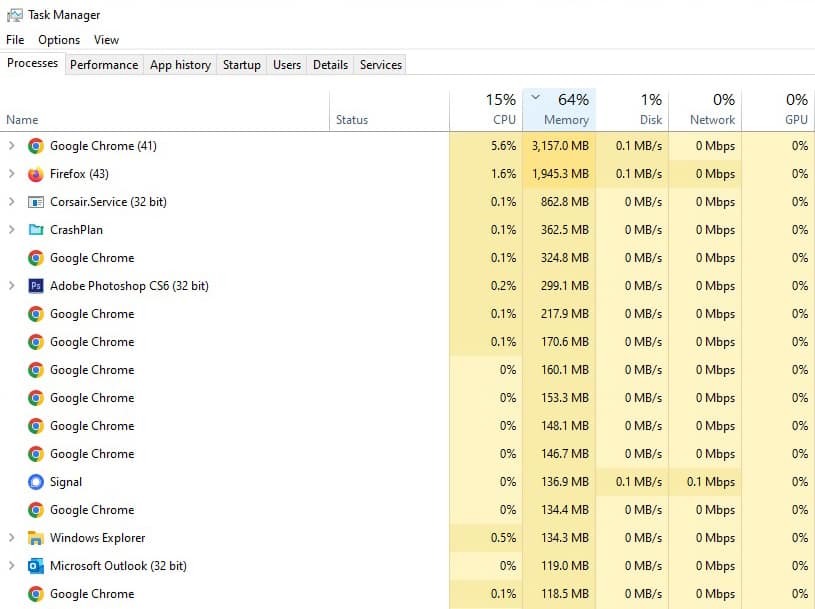
- The first tab in Task Manager, ‘Processes’ (see image below), is very useful as it will tell you which program is using the most CPU and memory resources. Clicking on the name at the top of each column in the ‘Processes’ tab will organize the results into numerical order with the highest consumer at the top. From here, you can quickly see which program is causing you issues.
- You can check the ‘Start-up impact’ column (in the ‘Startup’ tab) to see whether a particular program is rated Low, Medium, or High to decide on whether to disable it.
If you find after having made these changes that you need to re-enable a start-up program, just follow the above instructions again, but this time choose to ‘Enable’ instead of ‘Disable’.
2. Keep Windows and Drivers Up To Date
Windows updates are provided to fix issues and bugs that can and do affect the general running of your computer’s operating system.
These updates also include driver updates for your computer’s hardware. However, driver updates are not always as regular or indeed exactly the same as going to the actual component manufacturer site and downloading drivers directly.
Often, branded computers will include special applications to carry out this task for you.
If you’re a gamer using an NVIDIA graphics card, for example, use their GeForce Experience software to update your GPU drivers regularly and get the best and latest updates before Windows gets around to updating.
Keeping Windows updates current is another simple step towards ensuring everything is running smoothly with no unusual processes gobbling up all of your computer’s valuable resources in the background.
I’ve seen Windows computers running very old versions of Windows 10 with all sorts of problems because the end user had managed to disable Windows updates!
3. Reduce Overclocking
For gamers, the obvious next step after receiving their Gaming PC is to look into overclocking the processor (CPU) and or graphics card (GPU) to get better gaming performance.
However, overclocking means that the CPU and GPU are going to have to work much harder, which means more heat produced and the need for better cooling options.
If your CPU temperature is too high, then you either need to reduce the overclocking settings and/or improve your computer’s cooling arrangements.
With higher than normal CPU temps, there is also a good chance of additional noise from the fans as they work harder to cope with the extra heat and also potential throttling from the CPU as it reduces performance to protect itself.
If you do decide to overclock, make sure that the CPU cooler is capable of handling the extra thermal output/heat generated (represented in TDP – Thermal Design Power) and measured in watts.
Manufacturers and suppliers will often state the standard TDP in watts for a CPU and the TDP for an overclocked CPU, allowing you to correctly size your cooling to match, usually requiring a bigger heatsink and fan or larger AIO radiator.
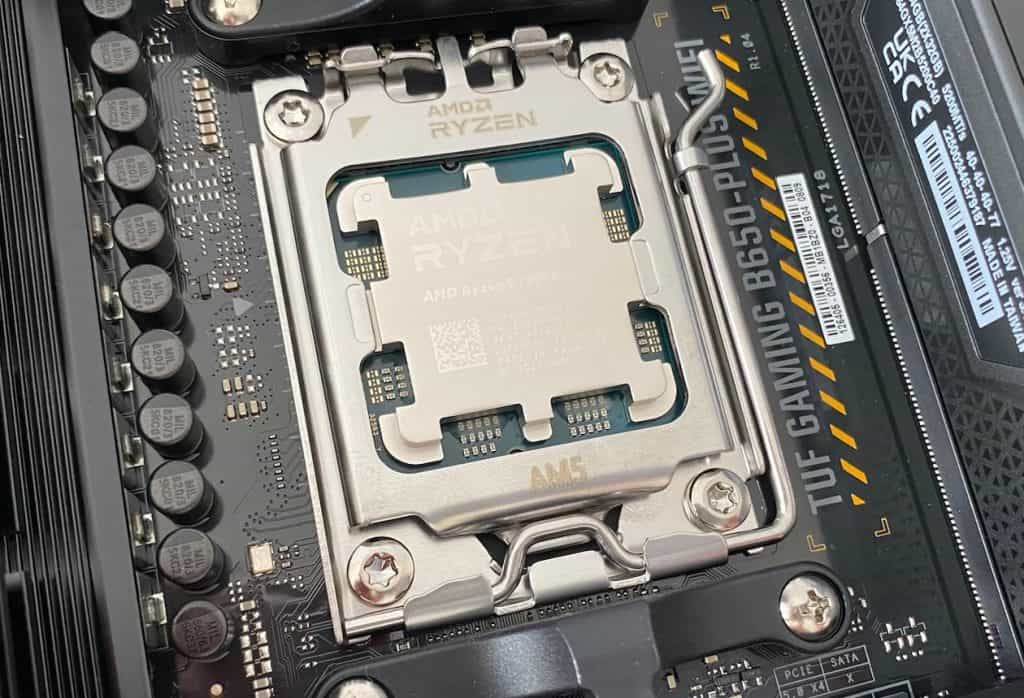
NOTE: The stock cooler that comes with Intel processors would not be suitable for cooling an overclocked processor. Ryzen stock coolers are generally better quality, although I would still upgrade to a better cooler if overclocking.
4. Undervolt Your CPU
One of the lesser-known methods of lowering your CPU temperature is to use a process known as ‘Undervolting’.
Undervolting your CPU involves reducing the voltage to your CPU to lower its power consumption and, consequently, its heat output.
To safely carry out Undervolting and avoid any potential stability issues, you should use one of the following software utilities to help you adjust the CPU voltage settings:
Intel Processors: Intel XTU (Extreme Tuning Utility) or Throttlestop
AMD Processors: Ryzen Master
Undervolting is a safe process, providing you check first for compatibility and proceed carefully.
IMPORTANT:
I recommend that you check that your processor and motherboard support undervolting before going ahead. Intel, in particular, has restricted this process in the past, and it’s not possible with certain processor models.
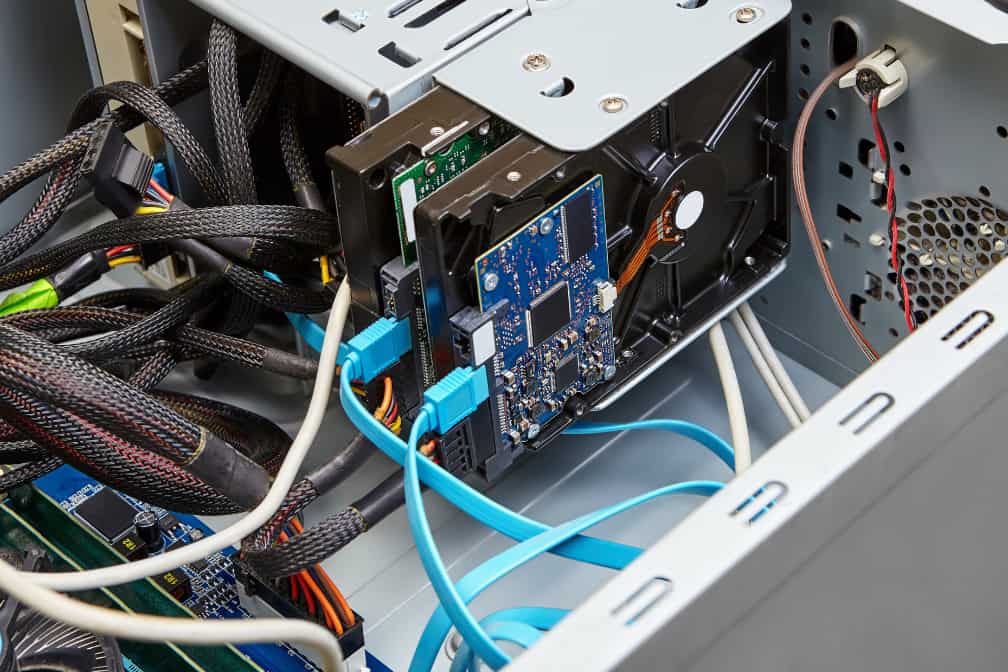
5. Remove Dust Build-up
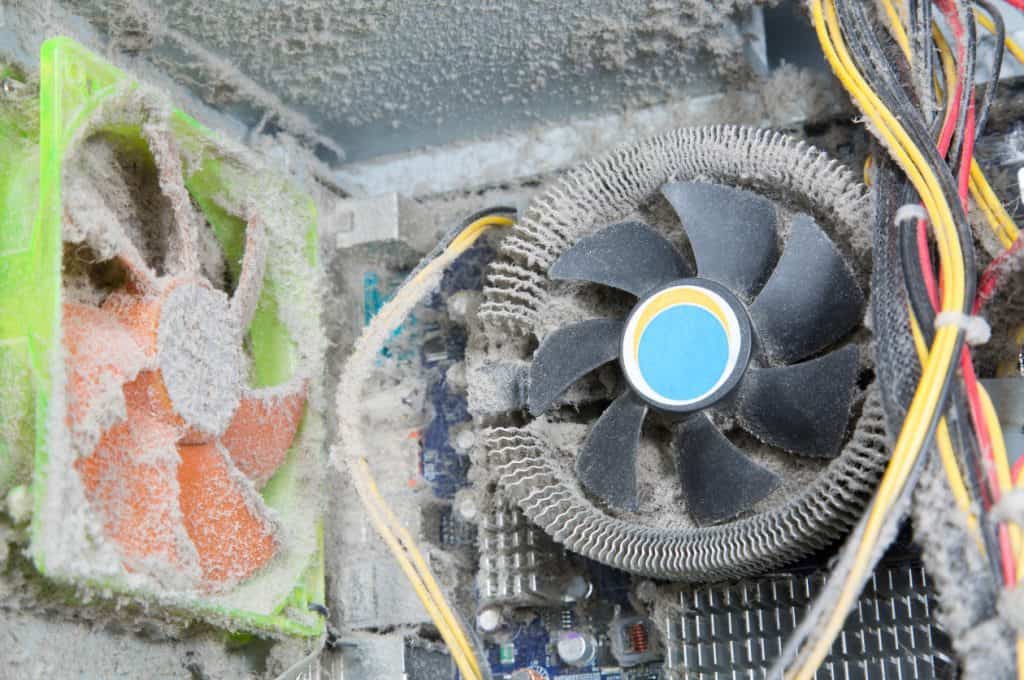
The biggest enemy of computers is dust, and pretty much every computer I’ve ever worked on has some degree of dust buildup.
Left without cleaning the dust away, it builds to the point where the computer can’t cool itself, and you start to get problems due to the heat.
Expect random crashes, freezing, and potential damage to components like the CPU (the CPU thermal paste could also prematurely dry out through excess heat from a dust-clogged CPU cooler) and motherboard.
Cooling fans start to go wrong when they get clogged with dust and can’t turn properly, eventually not turning at all.
Clean your computer regularly, be it a desktop or a laptop, and it will reward you with consistently reliable performance.
Related Article: How to Keep Dust Out of a Gaming PC
6. Avoid Heat Sources
Seems like an obvious point, but avoid keeping your computer near any heat sources like radiators or heating vents, as these will just prevent your PC from cooling itself with disastrous consequences.
If you are using a laptop, keep it away from heat sources in rooms like the kitchen, for example, a hot stove!
I’ve had customers who have melted the corner of their laptop while learning a new recipe off the laptop in the kitchen and got too close to the stove/hob.
7. PC Case Positioning
How and where you position your computer will make a huge difference to how well it can keep itself cool, so this is really important if you want it to last.
Desktops
Try to position your computer so that it has good clear space all around it; I would say at least 12 inches on every side and clear space above.
Too often, I see computers with their side vents blocked by cupboards or placed up against a wall, preventing proper cooling. This just accelerates dust build up inside the case and consequently heat build up too.
If you can, locate your PC off the floor and preferably up on a desk, away from dust pickup and passing pet cats and dogs.
Pet dander is not good for computer internals.
The same goes for laptops; keep them well away from pets, and never leave them on the floor, of course, for obvious reasons.
Laptops
Laptops are best used on a hard surface, if possible, like a desk, so that they can get some sort of space underneath to aid ventilation and receive some fresh air to draw in.
Using a laptop on a soft surface like a blanket, sofa, or your your own clothing covering your lap will greatly reduce its ability to cool and cause overheating, which in time can cause hardware failure.
8. Renew Thermal Paste
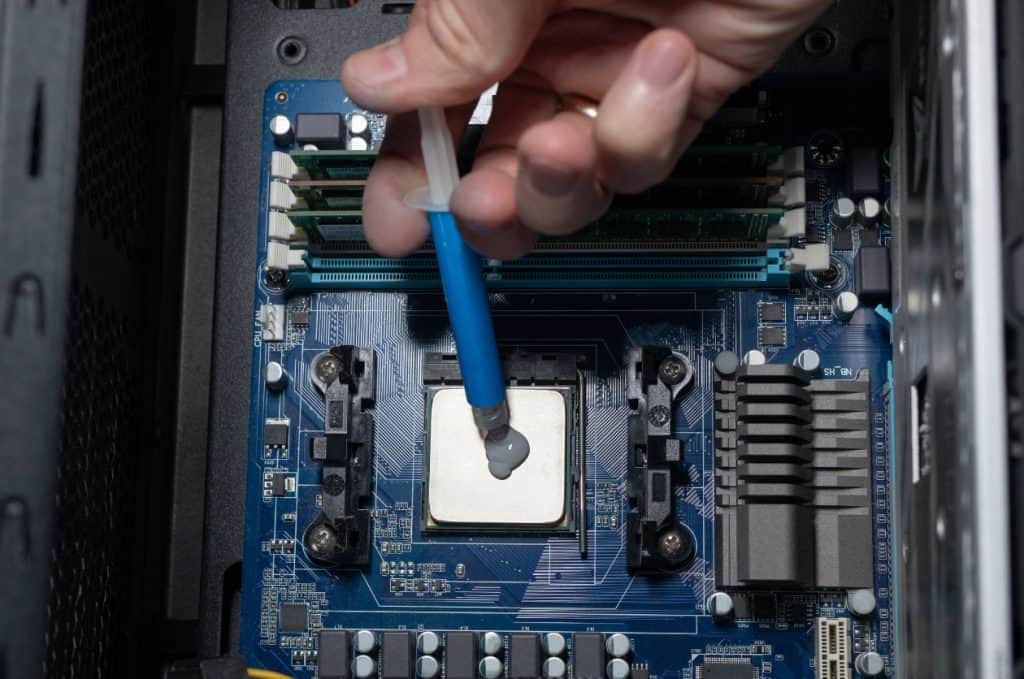
For most standard, everyday computers, I would expect the CPU thermal paste (a special paste that is applied to the surface of your CPU before the heatsink is placed on top) to last a lifetime, and it usually does.
I very rarely – if ever, come across the need to reapply thermal paste to the CPU of a standard desktop computer.
However, if there have been heating issues or a gaming PC, especially one that’s been overclocked, is involved, this thermal paste can dry out much quicker than usual, causing performance problems.
Applying fresh thermal paste is a relatively straightforward task and is worth considering if there have been consistently high CPU temperatures.
To apply fresh thermal paste:
- Turn off the computer and disconnect all cables.
- Lie the computer on its side and remove the access side panel
- Remove the CPU heatsink/fan assembly
- Carefully remove any thermal paste residue with rubbing alcohol and a dry, lint-free cloth
- Apply a very small amount of thermal paste by squeezing a small amount in a 2 mm thick line across the surface of the CPU or heatsink – either is fine. Note, this is just my way of applying paste; there are loads of different ways of putting this stuff on, and it doesn’t matter too much so long as you get an even coating that is not too thick or too thin.
- I then use an old credit card to smooth the paste over the whole surface of the CPU in a thin layer. All of the CPU surface should be covered in a nice, smooth, and even layer of paste.
- Now, refit your CPU heatsink and fan, and you’re good to go.
9. Liquid Metal Paste
Although very fiddly to apply and expensive too, liquid metal paste can offer better heat transfer than thermal paste.
However, it can damage aluminum heatsinks and, because it’s electrically conductive, can damage other components too. It comes in a liquid form and so can leak.
Liquid metal paste is probably best left to the experts or those with very steady hands!
I would say just using a fresh application of standard but good-quality thermal paste would be just fine for most of us.
Liquid metal paste is an option, though, so it makes this list.
This video covers the application of Liquid Metal for a Laptop CPU but covers the basics and can be applied to desktop processors as well: Liquid Metal Laptop Cooling
10. Fit a CPU Contact Frame
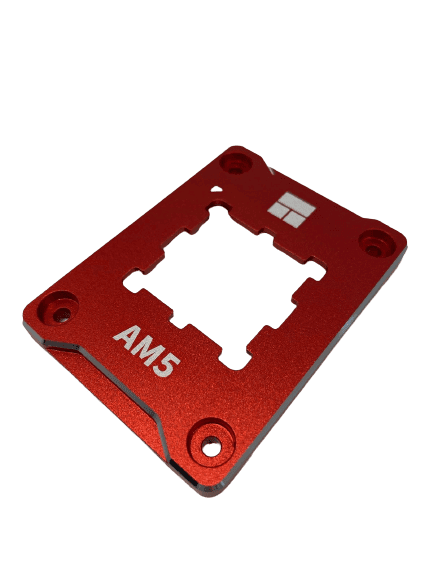
Precision machined out of aluminum alloy; a CPU contact frame is designed to fit in place of the usual CPU bracket to hold the CPU in a more even manner.
This frame helps prevent the possibility of the CPU bending slightly due to the uneven forces (albeit slight forces) usually applied by the CPU bracket / buckle when it is clamped down.
Aside from helping the CPU avoid any flexing, the main benefit of doing this is a reduction in CPU temperatures and a performance improvement. It’s a simple item to fit and very cheap to purchase, between $10 and $18.
These devices started appearing in 2022 and have favorable online reviews from purchasers and independent tests, seeing reductions in temperature of up to 10 degrees C.
I believe the temperature reductions are likely to vary quite a bit between users with different types of CPU and motherboard, quality of the thermal paste, and how well their thermal paste has been applied, etc., but any reduction in CPU temperature seems like a good thing to me.
Fitting the frame is a simple matter of carefully unscrewing the existing CPU buckle clamp, placing the contact frame over the CPU, and then using the four screws we removed earlier to tighten the frame down.
Thermalright sells these devices but makes no claims on their product page about temperature and performance improvements, which have come from users and 3rd party reviews.
Here’s a link to the Thermalright product page for their AM5 socket offering: http://thermalright.com/product/am5-secure-frame-red/
And another link to an Amazon seller for an LGA 1700 socket offering: Thermalright CPU Contact Frame for LGA 1700 Socket
11. Check CPU Air Cooler Sizing
If your CPU temps are too high, it could be that your heatsink and fan are not big enough for the task and need upgrading.
Prebuilt PC Cooler Sizing
If you have a prebuilt PC, and it is a gaming build, it should have already been correctly sized by the manufacturer, but not necessarily with overclocking capability built in.
However, sometimes manufacturers don’t include the best quality parts, so you might want to purchase a better cooler setup to help with your CPU temps, like upgrading to liquid cooling, perhaps.
If your prebuilt PC is a standard desktop PC for general use, you will probably have limited options for upgrading the CPU cooling, like fewer fan mounting points and less space for a larger cooler.
These types of standard prebuilt computers are usually built in large numbers with careful testing to make sure they can cool themselves under normal operation, so other tips in this list should be investigated to find out how you can lower your computer’s CPU temperature.
Self Build PC Cooler Sizing
For a self-built computer, you have the option to either choose the best cooler at the outset or upgrade it later if the CPU temperatures turn out to be higher than expected, especially if you decide to overclock it.
Your CPU Heatsink and Fan need to be carefully chosen to handle the TDP output from your CPU, i.e., your cooler needs to be big enough to deal with the heat generated. Manufacturers and suppliers usually list the heat output in watts for unclocked and overclocked CPUs, allowing you to size your cooling accordingly.
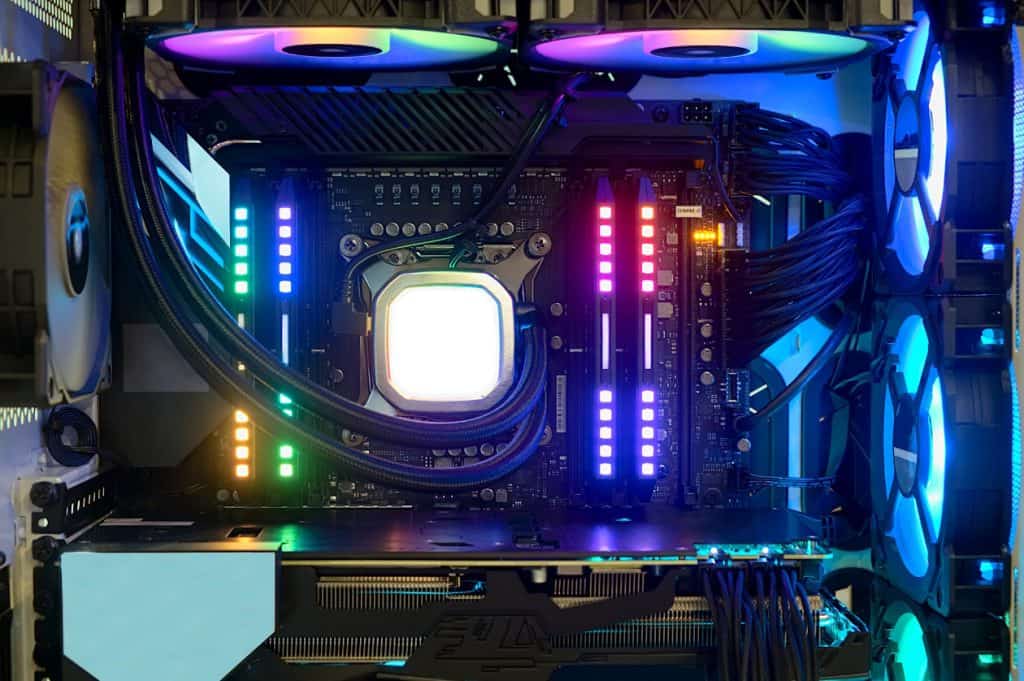
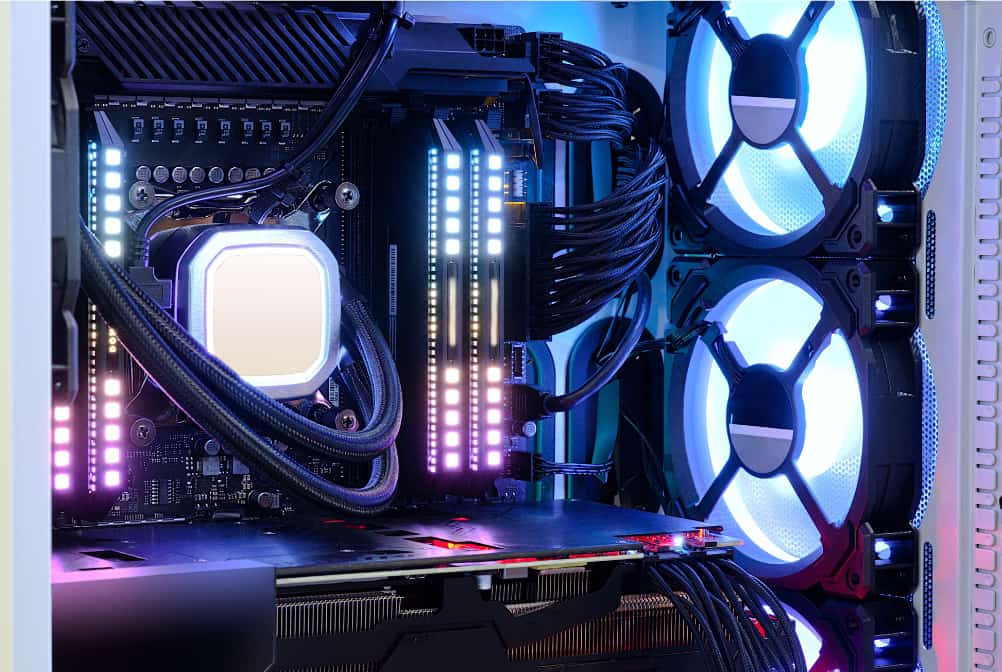
12. Upgrade from Air to Liquid Cooling
If you currently have an air-cooled system and you’re seeing high CPU temperatures, you may want to consider upgrading to a liquid cooler.
A good quality liquid cooler can provide better cooling than an air cooler as long as it has been sized correctly (sized according to the TDP rating of your CPU, both standard and overclocked). Liquid cooling comes in two forms:
- AIO (all-in-one) Liquid CPU Cooler, comprising of a one-piece sealed unit (closed loop) with a fan-cooled radiator and pump. These are the most popular form of liquid cooling as there is a lot of choice, and they are relatively easy to fit.
- Custom CPU Cooling Loop – These systems are a lot more expensive and also a lot more hassle to fit, but if done right, they will give better cooling performance than an AIO unit.
NOTES:
- With both of the above options, make sure that you order the right unit to match the CPU socket on your motherboard
- Check carefully to make sure that your chosen radiator has enough space in your PC case to fit. They can be quite bulky.
13. Check Existing Liquid Cooling Set Up
If your PC already has liquid cooling, make sure it is set up correctly to cope with the heat generated by your processor and ensure lower CPU temperatures.
Check the TDP (thermal design power)* rating for your CPU (your supplier will provide this figure) and ensure that your selected cooler has a TDP rating at least the same as but preferably above that specified for your CPU.
Your supplier will also usually provide a TDP figure for an overclocked version of your CPU so that you can size your cooler accordingly (i.e., to a larger cooler).
If you have the standard liquid cooler that came with your computer, but now you’ve enabled overclocking, there is a good chance the original cooler cannot cope, and so you’ll need to consider upgrading to a better cooler.
*TDP represents how much heat a component in your PC, like the CPU or GPU, generates when it’s running. This figure, measured in watts, shows how much cooling is needed to keep your components from overheating. A higher TDP means more heat and, consequently, more cooling to prevent overheating and possible damage to components.
14. Add More Case Fans or Fit Larger Fans
The number and size of your cooling fans can make quite a difference to the cooling of your PC, so it’s worth reviewing the fans currently fitted to see if you can make any worthwhile upgrades to get your CPU temperature down.
The Ideal Fan Layout
If you only have 1 case fan (most common in standard desktop computers – usually a 120 mm fan fitted at the rear) and if you have space available, consider fitting a fan at the front of the case, perhaps a larger fan (say 1 x 200 mm at the front) or a top fan (120 or 140 mm) to enhance cooling.
Ideally, you want to draw in as much fresh, cool air into the case at the front and side and then out through the rear and the top. So use front fans to pull cool air in and rear/top fans to extract warmed air out.
Consider a Better Quality Fan
If you currently only have one fan fitted and don’t have the space or mounting points for additional fans, consider fitting a better-quality item in place of the one already in place.
I can recommend Noctua as a quality case fan brand that’s well known for supplying excellent products that are most likely to be considerably better than a generic, unknown make that was supplied with your PC.
15. Check All Fans Are Working
Are your cooling fans all working properly? Do any of the fans make unusual noises?
Remove the side access panel and observe all fans if you can whilst the computer is running to see if all cooling fans are operational – listen for odd out-of-place noises that could indicate a fan issue. Replace any fan that’s not working.
Often, a failing fan will make more noise when the computer is cold, and once it warms up, the sound may go away. This is a problem that will only get worse and means the suspect fan needs replacement.
Some fans may run but not properly – check all computer fans to make sure they rotate freely and are not clogged up with dust, for example.
Do this manually with everything turned off, and the system unplugged, and see how easily the fan spins if you try moving the fan blades with your fingers.
A fan should move very easily with little to no resistance. If the fan does not spin freely and you encounter resistance, consider replacing the fan (if unsure, you can compare the resistance with other fans in your case if you have more than one fitted).
16. Check the Location of Case Fans
The location of your cooling fans is important to ensure the correct flow of air in to and out of your computer case and ensure adequate cooling for your processor and graphics card.
I would suggest 1 larger fan (say 200 mm) at the front (which can not only draw in more air but will mean quieter running as it would not have to spin so fast) of the case to draw air in and another fan at the rear to pull air out – this fan is usually smaller (usually 120 or 140 mm) due to its location.
If your case is larger, consider adding a fan or two at the top of the case (positioned to extract air out as warm air will rise upwards) and maybe another one at the front of the case if space allows.
What you’re looking for is neutral air pressure inside the case where airflow in is as balanced as possible by air flow out. Although no case airflow is going to be perfect as cases are not sealed, and so there will always be variations in flow one way or another.
The main objective with cooling is always to get as much cool air into the case as possible to cool your CPU and GPU and then get the warmed air out of your case as efficiently as possible.
Fitting or Moving Case Fans
Firstly, you need to turn off your computer and unplug the power cable just to be safe. Working with case fans is very straightforward. There will be mounting points at various locations in the case, the same as those currently used by your existing fan(s).
Each fan is secured by 4 screws and then connected to the motherboard by one cable connector (sometimes another connector if the fan has RGB lighting) to a fan header on the board.
Removing a fan is a simple case of undoing the 4 screws and carefully unplugging from the motherboard.
Fitting is the same process in reverse – just line up the fan with the mounting holes, screw it into place, and then connect the cable.
To gain access to the front or top of the case to add fans, you may have to remove access panels (refer to the documentation that came with your case or PC to find out how to remove these, especially if it’s a glass panel.).
When fitting your fan, take care to make sure the fan is facing the right way so that it either draws air in or exhausts air out.
You can tell which way to position the fan by a small arrow that makers often place on the edge of the fan to show the direction of airflow.
If there is no arrow, you can use the brand sticker on the fan, which is usually placed on the air intake side so that it’s more likely to be seen from inside the case through a glass access panel, for example.
Either way, you could just check by fitting it, turning on your system, and feeling the airflow on your hand to see whether it’s the right way around. If the airflow is not in the right direction, just refit it the other way round.
17. Check Fan Speed Settings
Depending on the computer you have, it may be possible to adjust the fan speeds in the BIOS. Often, they are set too low in an effort to ensure they make less noise! If that’s the case, you can tweak the settings via the right area in your BIOS.
To check and if necessary, adjust your cooling fan settings:
- Reboot your PC and press the ‘Del’ or ‘F2’ key to enter the BIOS before you see the Windows loading dots going around in circles – if you see these dots, you’ve missed the chance to enter the BIOS, and you’ll have to restart and try again.
- Once in the BIOS, you’ll need to enter the Fan Control section of your BIOS, and from there, you will see the option to adjust the settings for the speed of each fan
- Adjust as necessary, and when finished, either click ‘Exit’ or press F10 and then ‘Save Changes and Exit’.
18. Improve Cabling Inside Case
Messy cabling inside your computer case can impair effective airflow.
Tidying up the cabling so that cables are out of the way and can’t impede airflow is an easy win that will only likely cost you a bit of your time and a few tie wraps.
Some cases will be easier to work on than others. If you built the PC yourself, you likely have some form of cable management at your disposal to move cables around accordingly.
I would unplug all cables and then look at what goes where and see if you can group some cables together and use tie wraps to keep them in one place. It’s usually possible to group multiple cables together into a much neater look.
If your case has a bit of cable management, tidying the cables should be a lot easier as you can route cables from the back of the PC (the panel behind the motherboard) through access holes to where they need to go on the motherboard.
When you do this, keep the cables only as long as they need to be so that excess cable is not loose and flopping around in the case.
19. Change Case
If your computer case is on the small side, like a Mini-ITX format, for example, then cooling options will be limited, but depending on your system, you may be able to upgrade to a larger case, say a Mid Tower, for example.
A larger computer case will give you many more cooling options, in particular, much more space for better airflow. You’ll also have the space to fit more cooling fans and bigger CPU coolers. It doesn’t need to cost a lot and will only involve time on your part rebuilding your system (providing, of course, that you’re happy to do this sort of work or you have a knowledgeable friend to assist).
However, if you have a standard, branded desktop computer (e.g., HP, Acer, Dell, Lenovo, etc.), sadly, you’ll probably not have this option as the fitted motherboard will likely not match up to an off-the-shelf PC case.
For a self-build or custom-build PC, you should be able to change the case, provided that the computer system is not too old – computer technology is changing all the time, and this will eventually limit your options.
Related Article: Best Micro ATX Case
20. Change to Semi or Fully Modular PSU
This is another tip to help improve the cabling inside your case and consequently improve airflow at the same time and help reduce temperatures.
You can improve cooling by removing unnecessary cables with the use of a semi or fully-modular PSU, which allows you to choose which cables you’d like to use, which can help greatly with improved airflow in your case and lower temperatures.
This tip applies mainly to self-build / custom-build computers as branded computers ‘usually’ come with reasonably tidy cabling – certainly the computers I’ve seen from brands like Dell and HP.
If you have a standard power supply unit (PSU) in your self-build / custom-build computer, you’ll likely have cables in a jumble everywhere, and many that you don’t need are stuffed into a corner of the case somewhere.
To remove unnecessary cables and improve airflow, consider upgrading your PSU. It will take a bit of effort to fit and re-organize the cabling, but the results will be worth it.
21. Air Conditioning
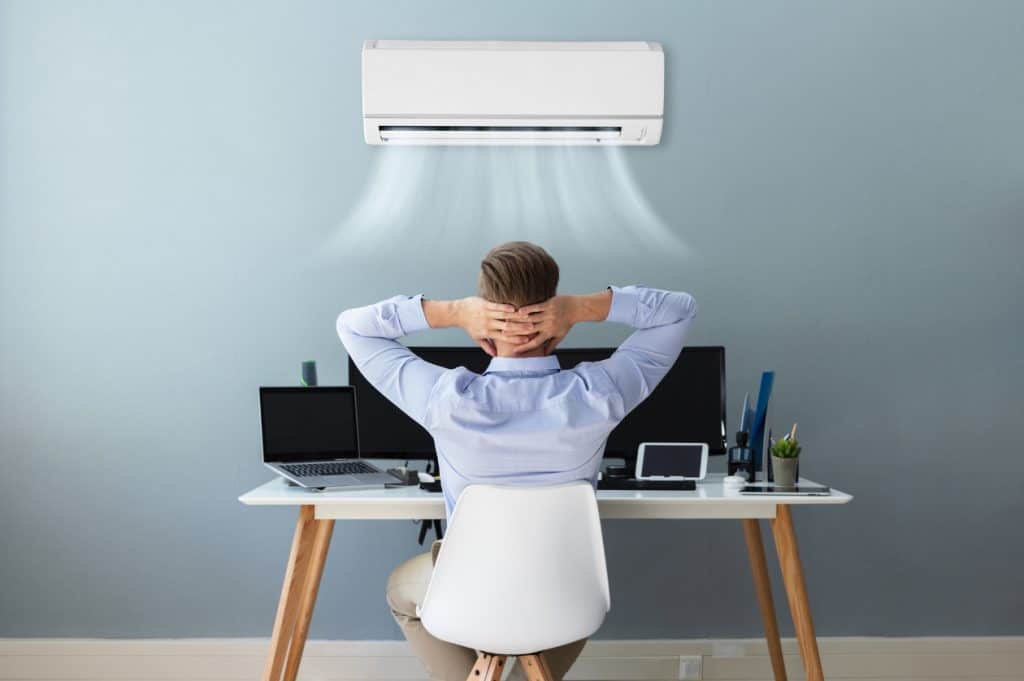
If you regularly have issues with high room temperatures, definitely consider installing air conditioning.
This will help tremendously with your PC cooling and will lower your CPU temperatures.
I’ve installed one in my own son’s bedroom to help bring down temperatures when he’s gaming, and it really has helped.
It doesn’t have to be hugely expensive. I just purchased a good second-hand free-standing unit for around $150 dollars and drilled a very large hole in his bedroom wall to connect to the air con unit, and we were good to go.
My electricity bill went up a bit, but it was worth it for a happy son!
22. Use a Laptop Cooling Pad
If you have a laptop that’s getting too hot, consider using a Cooling Pad. This is a stand with built-in cooling to assist your laptop’s own cooling system.
Laptops usually have their intake vents on the base, which are often restricted when the laptop is placed on a lap or blanket, for example, resulting in high temperatures.
The use of a Cooling Pad means that not only will your laptop be raised into a more ergonomic position for use, but it will also have an excellent cooling boost from the Cooling Pad.
There are many different types of cooling pads available now, and they’re not that expensive, starting from around $30.
23. Give Your CPU a Rest
Super-long gaming sessions can result in hot temperatures all around, especially if you have any of the issues addressed in this article.
Consider giving yourself and your computer a break now and then for an hour or so to allow everything to cool down.
Prolonged gaming sessions with an overclocked system are going to work your PC very hard, and that will definitely have an effect on its longevity.
CPU Temperature Information
Whatever computer you have and however hard you run it, it’s not a bad idea to keep tabs on how hot its vital components are and whether temperatures are straying away from a safe operating range into the unknown.
What Temperature Should My CPU Be?
With so many different processors out there from different manufacturers and all operating at a wide range of different settings (i.e., load and frequency), both standard and overclocked, in different ambient conditions, using different types of CPU coolers, it’s nigh on impossible to state specific temperature figures for every scenario.
Between Intel and AMD, only Intel currently states maximum operating temperatures for their processors, and they go into detail about the protections they have in place to protect their processors in the event of high temperatures, which can include throttling and automatic shutdown.
You can find out more about maximum operating temperatures for the Intel Core processor range at:
https://ark.intel.com/content/www/us/en/ark.html#@PanelLabel122139
From the above Intel page, once you’ve found your particular CPU model, you are looking for the ‘Tjunction’ figure, which Intel states is the maximum thermal junction temperature that a processor will allow before it resorts to using thermal protection mechanisms like throttling (restricting performance) and automatic shutdown.
For Intel, this Tjunction figure varies between each of their products but is usually between 100 to 105 degrees C. Of course, I don’t recommend you run your CPU anywhere near these temps!!
Personally, I believe the objective or goal in putting your ideal PC cooling system together should be to keep your CPU operating temperatures as far below the above-mentioned Tjunction figures as possible.
I would aim to keep the absolute maximum temperature for your CPU below 85 degrees C if possible – the lower, the better. It can go higher, but I don’t recommend it for both Intel and AMD.
Running your CPU at higher temperatures is obviously not ideal for the life of your computer, especially over extended periods, so I would keep a close eye on temps with a monitoring tool like one of those listed below and use the tips mentioned in this article to try and keep your PC as cool as possible.
NOTE:
If your CPU temps are very high, it’s also very likely that other components will be running very high temperatures, too!
So your PC could experience heat-related issues in other areas from constantly running hot.
How to Check Your CPU Temperatures
Keeping an eye on your CPU temperatures, particularly when you’re pushing it to its limits during a hard gaming session, is important and could enable you to see any problems before they become too serious.
The following tools are all great for checking and monitoring your CPU temperatures:
These programs do an excellent job of monitoring in different situations, but the best way to really test your system and establish a baseline would be to use a stress testing benchmark tool.
This would enable you to see if future temperatures ever go higher than your baseline and give cause for concern.
A good tool for benchmarking your CPU is Core Temp which is completely free. Once you’ve established your benchmark CPU temperatures, you can use one of the monitoring programs mentioned above.
Conclusion
There are plenty of options to consider when trying to keep your CPU cool, and many won’t cost you anything but a bit of your time.
I’ve tried to cover as many useful tips as possible and will add to this list over time if I think of any more.
Look after your computer by keeping it as cool as possible, and it will reward you with consistent, reliable performance and a longer life.
I hope this article has been of help.
Image Attribution and Licensing
Image #1: ‘Windows Startups’ by The Voice of Tech
Image #2: ‘Windows Processes’ by The Voice of Tech
Image #3: ‘Dusty parts of the computer’ by andrewsafonov licensed from Getty Images (Canva Pro)