
Expert Consulted: Adrian Gardiner. Years of experience buying both computers and computer parts for my own new customer builds has given me a good insight into the PC build process. In this article, I’ll be sharing my knowledge with you on the most common PC building mistakes.
I’ve been building computers for many years now and have experienced my own fair share of mistakes made, learning the hard way that good preparation and taking your time are key to getting it right the first time.
I also have to resolve customer issues after they’ve put together their own builds, and many of the mistakes I see are covered in this list.
In this article, I’ve listed the 45 most commonly encountered PC-building mistakes that I’ve seen during my time in the IT industry, hopefully saving you the hassle of going through them yourselves.
Related Articles:
How to build a gaming PC for under $1000
Find out How to Afford a Gaming PC
45 PC Building Mistakes to Avoid
There’s a lot to know when building your own computer, and this list should save you a lot of time and grief by avoiding the most common mistakes.
To make it easier to find the most relevant mistakes quickly, I’ve broken the lists down to the various stages of the PC build process to also including the preparation stage, selecting your components, and then the build process itself.
Preparation Mistakes
1. Not agreeing on a budget
Without setting a firm budget, if you’re like me, you’ll end up spending way too much when you see all the lovely component choices out there, like fancier computer cases, flashy LED RAM modules, and cool LED case fans, to name but a few.
It’s so easy to get tempted. Always set your budget before you start shopping.
2. Not getting the right tools to hand in readiness
Having the right tools to hand during a PC build is super important, and you’ll appreciate not having to go hunting for just the right screwdriver at a critical moment in the build when you really don’t want to have to stop.
3. Forgetting to check that you have enough space for the build
Make sure you have a nice clear area of space to work in where you can lay everything out, including all the new parts and the case, of course.
A dining room, kitchen table or a large desk would be great choices. Just make sure to lay some protection down before you start laying down your computer parts.
When you’re tight on space, you’ll start losing parts and tools, too, just when you need them. Usually, these parts and/or tools end up getting covered up by something else. It can really slow down the assembly process.
4. Assembling your PC on a poor surface
The surface you choose to assemble on needs to be level and clean and preferably have a layer of some thick protective material to look after the surface. The nice mahogany dining room table won’t look so good with a huge dent from accidentally dropping a corner of the case onto it.
5. Not preparing for Static Electricity
Static electricity is definitely something to watch out for and can damage sensitive electrical components like motherboards. To protect against this, the following tips will minimize any static electricity risk:
- Wear an Anti-Static Wrist Strap. These are quite cheap from Amazon at around $10 or less
- Try to stand on a non-carpeted floor and preferably also wear no socks
- If you don’t have a wrist strap, try grounding yourself every few minutes by touching a grounded object like some bare metal on a radiator, for example.
Component Selection Mistakes
6. Buying Cheap instead of Quality parts
Buying cheap parts is the biggest mistake you’ll ever make – the quality will almost certainly be suspect and could end up damaging other parts in your build. Always buy well-known, branded parts that have loads of great positive feedback. It might cost you more, but in the long run, it could save you a lot more in
7. Purchasing an unknown, cheap PSU brand
Buying a cheap, potentially low-quality, and unknown Power Supply Unit (PSU) brand for your new PC build almost certainly would be an unwise decision.
Buying an affordable PSU is one thing, as it’s probably OK in the short to medium term to get you going, but going for a cheap, lower-quality part is putting the rest of your system at risk.
The PSU is one of the most important components in your PC, and I would recommend spending a bit extra to get a quality item that will last you well. I can recommend well-known and respectable brands like:
- Be Quiet!
- Corsair
- Fractal
- ASUS
- EVGA
- Seasonic
- Thermaltake
- Antec
- CoolerMaster.
Before choosing your PSU, you need to size it up correctly to cover the total power in watts needed for the components in your system. To do this, you can visit https://pc-builds.com/power-supply-calculator.
You may find my related article, ‘Best 1000w Power Supply, ‘ useful. 1000w is possibly larger than what you’re looking for, but my article covers a number of key factors that are important when selecting your PSU.
The bottom line is always check online reviews for the PSU you’ve chosen to see how other users got on.
8. Not buying a fully modular PSU
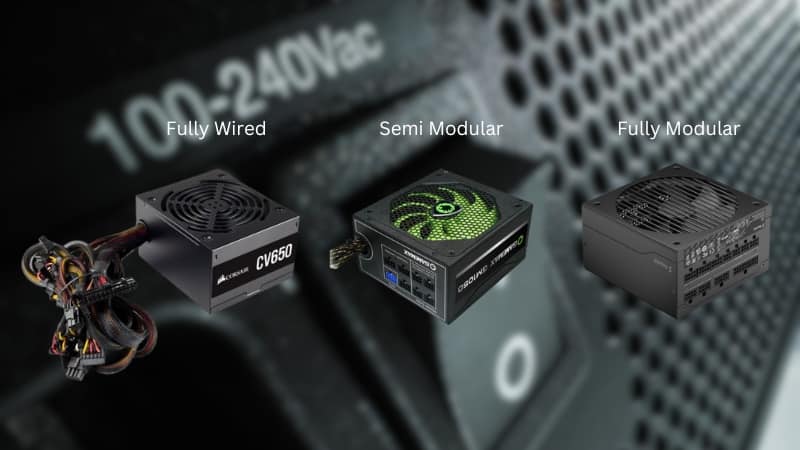
There are 3 types of PSU: Fully Wired, Semi-Modular, and Fully Modular.
This modular aspect refers to whether you can choose which cables you wish to use in your system, which, of course, can save you a lot of time and means your computer will look less cluttered and tidier.
A Fully Wired PSU comes with its various cables permanently connected to it, meaning you have to deal with many cables that you won’t be needing and have to hide them somewhere in your case.
Semi-modular means you get to choose some of the cables to use, but some are permanently attached.
With a Fully Modular PSU, all the cables are supplied loose, and you connect up only those that you need – these supply units are, of course, more expensive.
9. Choosing a PSU with too low a power rating
Always ensure that you choose a PSU that has some extra ‘headroom’ over and above the amount of power that your system will need.
This ‘extra’ will allow for power fluctuations and will mean the PSU isn’t running flat out all the time, which will help it last much longer. If your system needs 400w, for example, I would suggest a 450 to 500w PSU. If it needs 550w, go for a 600 to 650w unit and so on.
Choose a PSU with a rating too low for your system, and you’ll have all sorts of problems.
10. Choosing components that aren’t compatible with each other
When selecting your PC components, it’s important to ensure that they are all compatible with each other.
For example, if you choose an Intel i7-13700K CPU with socket 1700, you’ll need a motherboard with the same socket 1700 support to ensure that the CPU will fit.
This same compatibility issue also applies to other components like matching up RAM modules where DDR4 RAM will only fit a motherboard that supports DDR4 with the same applying to DDR5 RAM.
To help get this right, go to https://pcpartpicker.com/. This site will not only help you select the best parts for your build, but it will also warn you of any compatibility issues along the way.
11. Forgetting to purchase an M.2 SSD drive heatsink
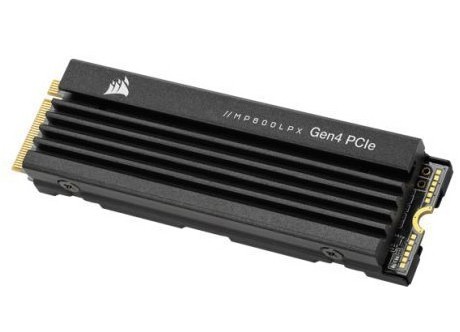
M.2 drives can get very warm, especially under heavy, extended use and more so the latest mega fast Gen 4 drives. A heatsink (some manufacturers call them heat spreaders) is an essential component to keep its temperature at an optimum level and reduce the chance of performance throttling.
Some drives come with a heatsink pre-fitted, but for most drives, you’ll probably need to buy one separately.
12. Overspending on the wrong parts
The most important parts in your system from a performance perspective will be the Processor (CPU), RAM, Storage Drive, Power Supply Unit (PSU), and Graphics Card if you’re building a Gaming PC.
Actually, I would add a decent motherboard to this list as well. Out of that list, the best-spec CPU and PSU are the most important, in my view. RAM and storage can easily be upgraded, as can the GPU when funds allow.
I would make sure that you get the very best versions of these components within your budget if a) you want the best and most reliable performance and b) you want your build to stand the test of time.
Spending too much money on fancy aesthetics with pretty LED components, for example, instead of focusing on the bits that actually make the system perform, is not going to give you the result you want. You can always add the fancy stuff later.
13. Buying a cheap computer case
A cheap computer case should come with health warnings on it!! Cheap cases often have all sorts of problems, like hidden sharp edges everywhere, leaving you with cut fingers and hands – I’ve been there.
These cheapie cases don’t include any provision for cable management, plus the casing material is usually of lower quality and feels like it. They are generally not nice to work in when putting a PC together, and for just a little bit more money spent on a reputable brand, you could get something much better.
You really can’t beat a decent, good quality computer case for which you would usually expect the most of the following:
- High-quality case material (no cut fingers)
- Tool-free panel removal (saves time)
- Cable management built in (inside of the case looks much better with tidy cabling)
- Captive screws (these don’t fall out when undone)
- Excellent instructions provided
- Case fan(s) included
- PSU Shroud often included
- Rubber grommets for cable access holes
- Many mountings for drives and fans
- Attractive case designs.
I can recommend the following case manufacturers:
- Fractal
- Corsair
- Be Quiet
- Antec
- ASUS
- Cooler Master
- Thermaltake
- NZXT.
A decent quality case doesn’t have to break the bank, with prices starting around $70!
14. Selecting a GPU that doesn’t match your monitor
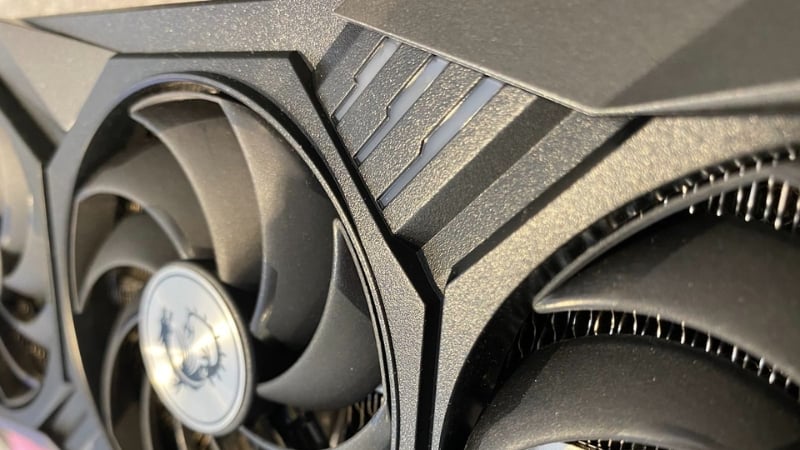
If you want to experience the full capabilities of your monitor, you’ll need to make sure your new graphics card (GPU) has the power to do this.
So, if you purchase a new RTX 4070 graphics card but your monitor is only capable of 1080p 60 Hz, for example.
In this case, you’d need to change up your monitor for a higher-end model capable of, say, 1080p but with a 240 Hz refresh rate or 1440p 240 Hz. Otherwise, you’d be wasting your money on the expensive graphics card unless, of course, you plan to upgrade your display at a later date.
The reverse applies, of course; if you buy a fancy monitor but try to use it with a cheap graphics card, you’re never going to get the screen quality you’d expect from a high-end monitor. In this case, a GPU upgrade would be required.
15. Not checking to ensure that ports on your GPU match the monitor
You need to decide at the outset what display cable connection you plan to use. If you plan on building a gaming PC, then a DisplayPort cable would be the best option.
Knowing the cable type, you next need to ensure that the Graphics Card and Monitor both have a DisplayPort port ready for your cable.
Most monitors and graphics cards will usually have a selection comprising of DisplayPort and HDMI ports.
16. Choosing a GPU that won’t fit your case
Graphics Cards come in a wide range of sizes and, depending on the computer case that you choose, may not fit – usually, it’s the length of the card that’s the issue (sometimes also the number of expansion slots taken up by the card). As an example, the RTX 4090 measures around 460 mm in length and takes up 3 expansion slots.
All case manufacturers will state the maximum length of GPU that their case can support, so always check this before purchasing.
17. Buying an overclockable CPU with an unclockable motherboard
If you want to overclock your new system for the best gaming performance, you’ll need to remember to make sure that both your CPU and Motherboard support overclocking.
Not all processors and motherboards support overclocking so check carefully with either your supplier or the manufacturer.
See my related article: Intel K vs KF vs F – What they mean
18. Choosing a CPU cooler that’s too big/tall for the case
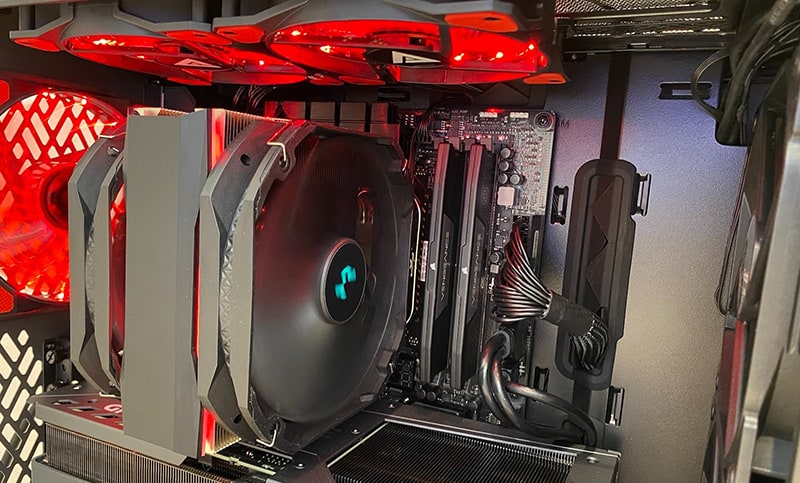
If you choose to air cool your CPU, check the height of the CPU Cooler, as these can be huge and may not fit in your chosen case.
Air Cooler manufacturers always state the height of their CPU in the product description, and case manufacturers will always state the maximum support CPU height.
19. Motherboard does not support case USB ports
Your case may come with the latest USB ports on the front, like a USB 3.1 Gen 2 Type-C port, for example, but your chosen motherboard may not include the necessary support (i.e., no header on the board for a Type-C port).
Always check the motherboard and the case to make sure both support the ports that you want on your case.
20. Selecting case cooling fans that are too big for their location
Make sure to check the computer case specifications carefully so that you know what size case fans will fit before purchasing. Depending on the case you select, cooling fan sizes can range from 40 mm all the way up to 180 mm. The most common case fan sizes tend to be 120 and 140 mm.
21. Selecting case cooling fans with insufficient cooling flow
Always check to make sure that you have enough good cooling in your case to allow for the heat generated by your installed components, in particular the CPU and GPU, which will be generating most of the heat.
I would recommend, at a minimum, 1 x 140mm fan at the front, 1 x 120 mm fan at the rear, plus, if necessary, 1 or more 140 mm fans at the top (subject to available space). You can also often install more than one fan at the front, depending on the case format.
22. Forgetting to purchase a Wi-Fi adapter
I’ve done this myself a few times and built a case only to find that there will be no nearby ethernet connection for Internet access. Some high-end motherboards include built-in Wi-Fi support, which is great.
However, most motherboards don’t include Wi-Fi, and so an adapter, either PCIe or USB, is required. It’s a cheap and simple fix, but still annoying.
23. Not getting a motherboard speaker
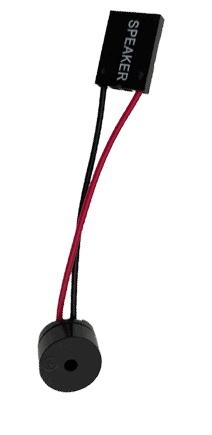
This is not an essential item, but it can be really useful if you ever need to troubleshoot any teething problems after putting together your build.
This little speaker, which plugs directly into the motherboard, will enable you to hear a range of different support beep codes (covered by the motherboard manual), potentially saving you a lot of time in resolving your issue.
Some cases come with a speaker, but most don’t. It’s worth checking and getting one if you can – they don’t cost much but could save you a lot of grief.
Build Process Mistakes
24. Not taking care over the cabling process
Taking care with the cabling up of your PC can make a huge difference in several ways:
- Neat and tidy cabling will look much nicer, especially if you have a clear side panel that’s designed to show off the inside of your PC
- It will help greatly with the flow of air through the case without the obstruction of cables
- Working on your computer in the future will be much easier in a tidy computer case. There’s nothing worse than having to untangle a disorganized mass of cables inside your PC to get to various components.
25. Ignoring the product manuals
For a newcomer to computer building, making good use of the product manuals is essential, particularly with regard to assembling the motherboard and all related components.
The motherboard manual, for example, will show you how to fit the CPU, RAM and connect all the various cables. Damage to hardware is very easy if you don’t know what you’re doing.
Not checking the manual carefully is a recipe for disaster.
26. Forgetting to install the I/O shield before fitting the motherboard
This is an easy mistake for a newcomer to make. You assemble the motherboard with all the various bits fitted, like CPU, RAM, CPU Cooler, etc., cable it up, and then fit it into the case, only to find out later that you forgot the I/O shield and have to start over.
Easy to forget, but easy to fix.
27. Not installing the right number of motherboard stand-offs
Most computer cases that I’ve worked with, from basic to high-end, almost always come with most of the stand-offs that you’ll need already fitted. However, there are usually a few missing (the case will always come with spares) that have to be fitted before you can install your motherboard.
It’s very important to fit the right number of stand-offs so that you can properly secure your motherboard so that a) it doesn’t make contact with the bottom of the computer case and b) it doesn’t flex when you plug a cable into it, for example.
Motherboard stand-offs are designed to prevent your board from coming into direct contact with your case and prevent shorting. If your case has no stand-offs fitted at all, always fit them before installing your motherboard.
By just carefully lowering your motherboard into the case, you can easily see which stand-offs are missing and then fit them.
28. Forgetting to check CPU cooler clearance before installing RAM

This has caught me out on occasion, especially when working with a new type of cooler. You fit the CPU cooler after fitting the CPU and then go to insert the RAM modules only to find that the CPU cooler is in the way. The only way to fix this is to remove the CPU Cooling Fan, insert the RAM, and then re-attach the cooling fan.
The other approach would be to check first to make sure that your selected CPU Cooler isn’t going to be an issue when it comes to fitting the RAM modules.
29. Not installing CPU, CPU Cooler, RAM, and M.2 storage to Motherboard before fitting
Depending on the case that you select and how much space you have, fitting the CPU, CPU Cooler, RAM, and M.2 storage can be a real pain if the motherboard is already installed in the case.
Connecting the case cables (for the USB Ports, power switch, sound, and headphone jacks) can also be very tricky when the motherboard is already fitted.
I always get these bits done before installing the motherboard into the case – it can be a real time saver.
30. Forgetting to screw in the motherboard to all screw locations
As mentioned earlier, it’s very important to secure the motherboard will all the necessary screws.
However, it can be hard to see all the screw-fixing points to do this, so if you’re not used to the process, it’s easy to miss one or two. Always check everything carefully after fitting the motherboard to see if you’ve missed anything, as it will be even harder to see screw-fixing points once the power cables are fitted.
I use a good torch attached to my wrist, which helps me a lot.
31. Trying to install RAM the wrong way, causing damage
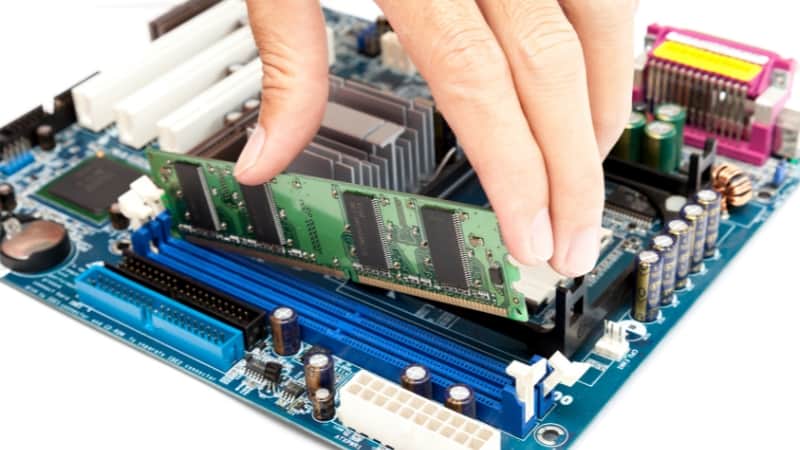
Another easy mistake to make if you’ve never done this before. RAM modules will only go in one way and will make a satisfying click once fitted.
If you look at the RAM module and the slot it goes into very carefully, you’ll notice that there is a notch along the bottom of the RAM module that needs to be aligned with the small corresponding ridge in the RAM slot.
Never force the RAM into the slot – it needs a firm press to engage until you hear a click as the securing latch comes down.
32. Not understanding Dual Channel RAM configuration
If your RAM comes as a kit of two equally sized modules (very common), they need to be installed in a certain way, as defined in your motherboard manual.
So if you have 4 memory slots and 2 modules to fit, the install order would be to fit one module, then leave the next slot empty and fit the remaining module in the next slot – basically staggering the installation.
Installing each module in the right slots is important if you want to enable dual-channel memory correctly and achieve the best performance. Always check your motherboard manual.
33. Installing the CPU incorrectly, causing damage
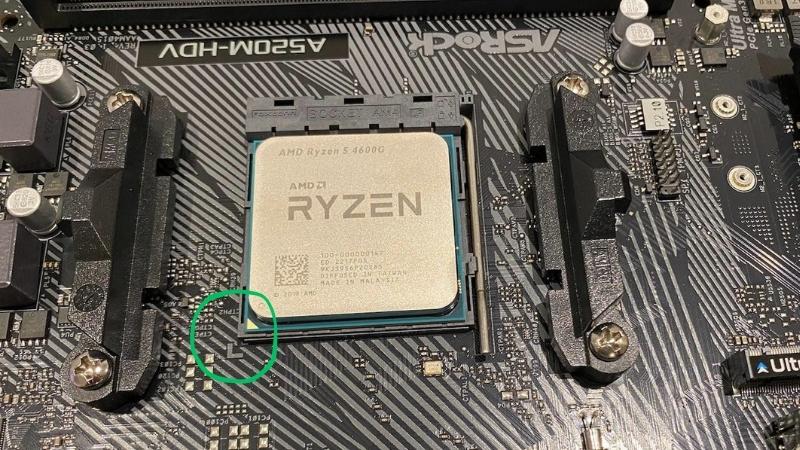
Installing the CPU correctly is critical, and getting it wrong will cause irreparable damage. The CPU will have markings on it that will align with similar markings on the motherboard CPU slot. Carefully align the CPU up and gently lower it into place, and you should be fine.
The markings on the CPU and the corresponding CPU slot do vary according to the processor make and model used.
34. Incorrect CPU Cooler installation
CPU Air Cooler installations can be very fiddly to do but usually are not that bad if you follow the manufacturer’s instructions carefully. This install definitely needs to be completed before the motherboard has been installed, as you will probably need to support the CPU Cooler backplate on the back of the motherboard while fitting the cooler.
Getting the CPU Cooler installation right is important as you will want to ensure that the cooler heatsink makes a good, level, and even contact with the surface of the CPU to ensure good heat transfer.
I’ve seen instances of self-build PCs where the heatsink doesn’t make full contact with the CPU, causing major heat problems that ended up damaging the CPU in one case and causing severe performance throttling and boot issues with another.
35. Forgetting to add thermal paste to CPU / heatsink
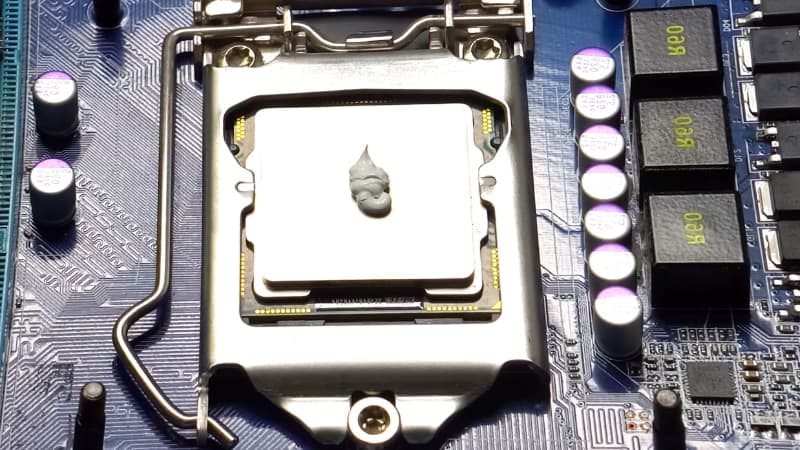
Many CPU coolers come with thermal paste already applied to the heatsink, saving you the trouble, but this isn’t always the case, meaning you have to do it yourself.
Applying thermal paste isn’t too difficult, and what you need is just a layer of paste over the heatsink surface. I usually squeeze out a 2 mm thick line of paste and then, in one movement, spread the paste over the heatsink surface with an old credit card. The credit card usually does this job very well.
36. Adding too much or too little thermal paste
Getting the right amount of thermal paste onto your CPU heatsink can be a bit of an art, but put too little on, and you’ll have heating issues. Put too much on, and it’ll be very messy, with the excess spilling out over the CPU once the heatsink is installed and squashes the paste down.
Following the process I described in No. 34 will help with your thermal paste application.
37. Forgetting to connect all cables to the motherboard
It’s easy to get this one wrong, and it’s usually one of the following cable connections that goes a bit wrong:
- Motherboard Power Cables – usually one of two or even both are missed, preventing boot-up
- USB Header Connection – sometimes, the USB cable doesn’t get plugged in all the way, resulting in a faulty USB port
- Case Cooling Fans – cabling for these can be tricky, especially when there are quite a few, and sometimes a fan will be missed, resulting in much head scratching after the PC is turned on for the first time.
Sometimes, cables are not fully plugged in because they’re hard to get at, making it difficult to get your fingers in the right place to grip the cable connector properly.
The key here is to take your time with the build and carry out several checks after completing the installation of a particular component to make sure nothing was missed.
38. Mixing up the case I/O power, reset and power led cable headers
Mixing up the cables that come with the computer case when connecting them to the motherboard is another easy mistake to make, especially if you complete this cabling when the motherboard has already been fitted to the case.
It’s all too easy to get the tiny power and LED indicator cables mixed up when plugging them in, as the header pins are usually so small and difficult to access, not to mention the microscopic identifiers for each pin on the motherboard itself.
This is where the motherboard manual can really help. Also, fit these cables before you install the board into the case.
39. Bending pins fitting cables to the motherboard too aggressively
You need good lighting, access, and lots of patience when fitting certain cables to the motherboard, in particular the case cable headers (power, reset, LED, etc.), USB 2.0 headers, audio headers, and in particular the USB 3.2 Gen1 Header which I’ve found is very susceptible to pin damage.
If you take it slow and careful, you’ll be ok. Just make sure to line everything up perfectly before you plug in a cable.
Some of these cables require quite a firm push, so if you’ve not aligned everything up before trying to connect the cable, you could end up bending one or more pins.
40. Installing fans so that they pull air in the wrong direction
The goal with case cooling fans is to draw cool air in at the front and sometimes the side, too, and then exhaust that hot air out of the rear and often the top, too, if the case supports it.
A cooling fan can be used to both draw air in and exhaust air out, and to make it do either, you just have to get the orientation right when fitting it.
When fitting your fans, you’ll want them all pointing roughly in the same direction through the case to pull air across your system and out the back.
Most case fans have a small arrow marked on the frame that shows the direction of airflow. This would mean pointing the arrow towards the inside of the case for air intake and pointing the arrow towards the outside to exhaust the heated air.
Also, case fans usually blow air in the direction of the protective grille that you’ll find on one side of the fan.
You’ll know if you got the installation right when you turn the PC on and feel the air coming out of the back.
41. Working on the PC while it’s powered up
Hardly needs explanation, but simply put, don’t work on the inside of your PC while it’s turned on if you value your expensive computer components.
Always turn off your PC and remove the power cable when you need to work on it or replace/upgrade a part, for example.
42. Forgetting to check BIOS settings after 1st start-up
Most new systems will automatically take you straight to the BIOS if you don’t have your installation media ready, like on a USB Flash Drive, for example, in which case your Windows install will begin if all the hardware is installed correctly.
In any case, it’s a good idea to enter the BIOS to just check that all components have been recognized properly.
43. Throwing away component boxes.
Never do what I occasionally do and throw away your component packages/boxes after fitting. I often forget and chuck away the boxes only to find that something was faulty, and I have to return it.
I would keep them all, if possible, until the expiry of the warranty period.
Post-Build Process Mistakes
44. Connecting monitor to motherboard port instead of GPU
One of the most common mistakes made is to connect your monitor to one of the integrated graphics ports on the back of your PC instead of to the port on your graphics card.
Often, you’ll get no output by connecting to the integrated motherboard graphics ports, especially if your CPU has no graphics support.
The graphics card ports will be located lower than the motherboard graphics ports and arranged horizontally, so they should be easy to find.
45. Not updating drivers after first start.
When you boot into Windows for the first time, I would recommend first going to Windows update to get not only Windows updates out of the way, but also driver updates too.
If anything in your system is not working after running the Windows update, you’ll need to head over to the manufacturer support site for your motherboard to download and/or update any missing hardware drivers.
Conclusion
As you can see, there are quite a few pitfalls when building your own PC. However, I would say the vast majority, if not all of these, could be avoided with good planning and simply taking it steady.
Armed with this list, you’ll now have a head start on pretty much every other PC-building newcomer out there, hopefully making the process a lot more enjoyable.